
How to Make Coffee Less Bitter: 12 Easy Fixes

To make coffee less bitter right now, try these quick adjustments before your next brew:
- Coarsen your grind. A finer grind pulls more bitter compounds faster. Go one or two steps coarser and taste the difference.
- Drop your water temperature 5–10°F. Water above 205°F over-extracts bitter compounds quickly. Aim for 195–200°F.
- Shorten your brew time. Cut steep or contact time by 30 seconds and see if the harshness fades.
- Use a little less coffee. A ratio that’s too strong can push bitterness up. Try 1 gram of coffee per 16–17 grams of water.
- Switch to filtered water. Tap water with high mineral content can make your cup taste harsher than it should.
- Choose a medium roast. Dark roasts carry more roast-derived bitter compounds. A medium roast is a gentler starting point.
- Add a splash of milk or cream. Fat softens bitterness fast. Even a tablespoon makes a noticeable difference.
- Try a tiny pinch of salt. Less than 1/16 teaspoon per cup can suppress bitter receptors without making your coffee taste salty.
Test one change at a time. That’s the fastest way to find what’s actually causing the bitterness in your cup. If you want a step-by-step diagnostic, jump to the troubleshooting checklist below.
Key Takeaways
Fixing bitter coffee almost always starts with extraction: coarsen your grind, lower your water temperature, and shorten your brew time before changing anything else.
| Point | Details |
|---|---|
| Fix extraction first | Adjust grind, temperature, and brew time before switching beans or adding anything to the cup. |
| One change at a time | Test a single variable per brew session and note aroma, first sip, and aftertaste to identify what’s working. |
| Roast level matters | Medium roasts carry fewer roast-derived bitter compounds; research suggests they may also mask caffeine bitterness more effectively than light roasts. |
| Water quality counts | Hard or unfiltered tap water can amplify harshness; a carbon pitcher filter is the easiest first test. |
| The Flaming Bean Evening Roast | A medium roast with a smooth, balanced profile, a practical low-bitterness starting point while you dial in your technique. |
Table of Contents
- Why your coffee tastes bitter in the first place
- Five brewing variables that control bitterness
- How bean choice, roast level, and freshness affect bitterness
- How water quality changes the taste of your cup
- Method-by-method fixes when your brew tastes bitter
- Quick fixes for a cup that’s already brewed
- Why a clean brewer makes a real difference
- A 5-minute troubleshooting checklist for a bitter cup
- What recent research tells us about coffee bitterness
- The testing plan that actually works, in my opinion
- Evening Roast: a smooth starting point for less bitter coffee
- Sources
Why your coffee tastes bitter in the first place
Bitterness in coffee isn’t one thing. It’s the result of several overlapping causes, and knowing which one is driving your cup makes fixing it much easier.
The two main sources are over-extraction and roast-derived compounds. Over-extraction happens when water pulls too many soluble solids from the grounds, including the harsh, astringent compounds that come out last. Roast-derived compounds, like melanoidins and certain chlorogenic acid breakdown products, form during the roasting process itself and are present in the bean before you even brew.
Here’s how each common cause maps to something you can actually change:
- Over-extraction (grind too fine, brew time too long, water too hot, too much agitation) → adjust grind, time, or temperature
- Too-dark a roast → switch to a medium roast; roast level shapes flavor in ways that go well beyond color
- Stale beans → buy fresher coffee, store whole-bean in an airtight container
- Hard or unfiltered water → run a filtered-water test
- Dirty equipment → clean your grinder and brewer more often than you think you need to
Caffeine itself is bitter, but it’s not the whole story. According to research from the American Chemical Society, caffeine’s bitterness is significantly reduced when it interacts with melanoidins and chlorogenic acids produced during roasting. That’s part of why a well-roasted cup doesn’t taste like raw caffeine powder.
Understanding this helps you make smarter choices. You’re not fighting one compound. You’re managing a system of variables, and most of them are within your control.
Five brewing variables that control bitterness
Over-extraction is the most common cause of bitter coffee, and five variables control how much extraction happens. Adjust any one of them and you change the flavor.
| Variable | Recommended Range | Direction to Reduce Bitterness |
|---|---|---|
| Water temperature | 195–205°F (pour-over); 195–200°F (espresso) | Lower by 5–10°F |
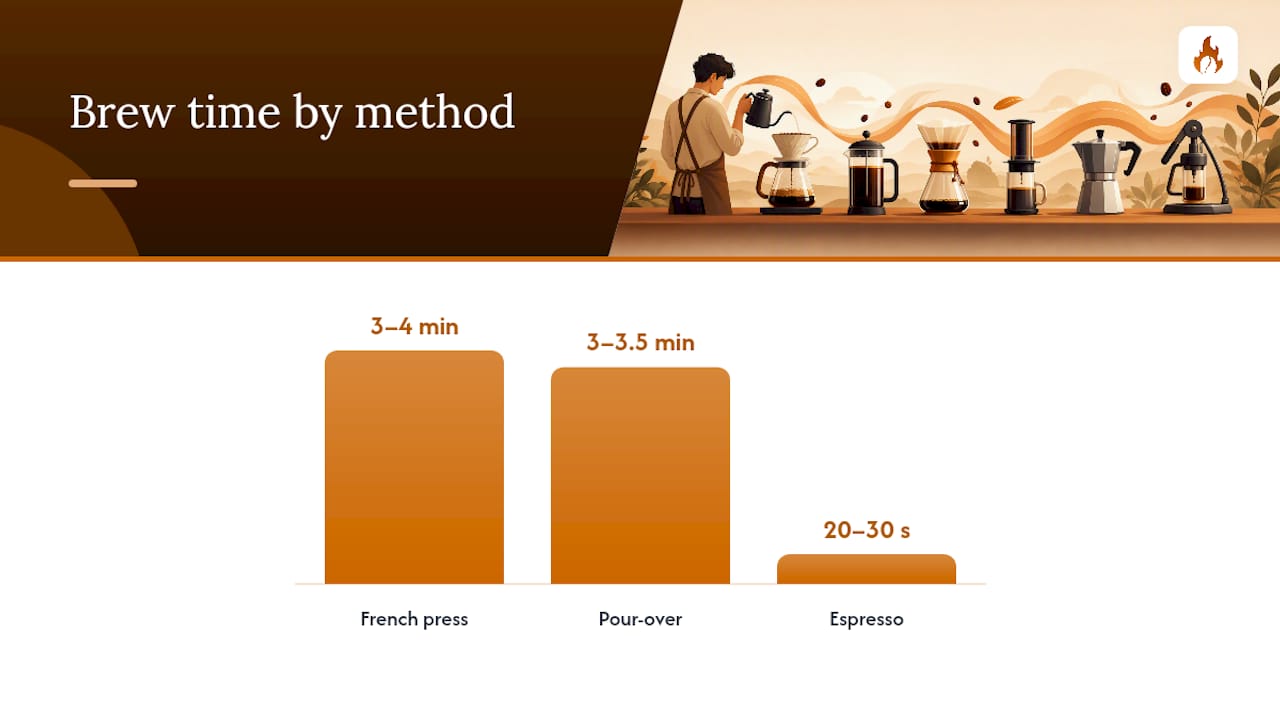
| Brew time | 3–4 min (French press); 3–3.5 min (pour-over); 20–30s (espresso) | Shorten by 20–30 seconds |
| Grind size | Medium-coarse (French press); medium (drip/pour-over); fine (espresso) | Go one step coarser |
| Coffee-to-water ratio | 1:16–1:17 (pour-over/drip); 1:2–1:2 (espresso) | Reduce coffee dose slightly |
| Agitation/flow | Gentle, even pours; avoid over-stirring | Reduce agitation |
A few practical notes on each:
- Temperature is the fastest variable to test. Let your kettle sit off the boil for 30–45 seconds before pouring, or use a temperature-controlled kettle set to 200°F.
- Brew time matters most in immersion methods like French press. Letting grounds sit too long pulls the harsh compounds that come out after the good stuff is already extracted.
- Grind size affects surface area and extraction speed. A coarser grind slows extraction and reduces the chance of pulling bitter compounds. Grind consistency matters just as much as size — uneven grounds create a mix of over- and under-extracted particles in the same cup.
- Ratio is easy to overlook. A stronger brew isn’t always more bitter, but if you’re already over-extracting, a higher dose amplifies the problem.
- Agitation in pour-over brewing can push extraction faster than you want. Slow, even pours give you more control.
Pro Tip: Change only one variable per brew session and write down what you tasted before and after. Two changes at once makes it impossible to know what actually worked.
For a deeper look at how these variables interact, the coffee extraction primer at The Flaming Bean covers the theory in plain language.
How bean choice, roast level, and freshness affect bitterness
The brew method matters, but so does what’s in the bag. Choosing the right beans and keeping them fresh can reduce bitterness before you even touch your kettle.
Roast level is the biggest factor. Dark roasts develop more roast-derived bitter compounds during the longer, hotter roasting process. Medium roasts retain more of the bean’s natural sweetness and acidity, which balance perceived bitterness. CoffeeResearch confirms that medium roasts and coarser grinds typically produce less perceived bitterness because they change the soluble solids profile of the brew.
A few practical starting points:
- Choose a medium roast if you find coffee consistently too harsh. It’s the most reliable single change for reducing bitterness.
- Look for washed-process coffees. These tend to have cleaner, brighter flavor profiles with less of the heavy, roasty notes that read as bitter.
- Buy recently roasted beans. Whole-bean coffee is at its best within 2–4 weeks of the roast date. Stale coffee loses its natural sweetness and the bitterness becomes more pronounced.
- Store whole-bean, not pre-ground. Ground coffee goes stale in days. An airtight container away from heat and light keeps whole beans fresh longer.
- Grind just before brewing. This is one of the most impactful changes you can make for overall flavor quality.
On decaf: the decaffeination process does remove some bitter compounds along with caffeine, so decaf often tastes slightly less bitter. The tradeoff is a somewhat flatter flavor profile, which isn’t for everyone.
The roast date guide at The Flaming Bean explains exactly what happens to flavor as beans age, and why freshness windows matter more than most people realize.
How water quality changes the taste of your cup
It’s also one of the most overlooked sources of harshness.
Hard water, with elevated calcium and magnesium levels, can make extraction harsher and amplify bitter notes in the finished cup. Soft or filtered water generally produces a cleaner, smoother result. The fix is simple and costs almost nothing to test.
A quick A/B water test:
- Brew your usual recipe with tap water. Note the flavor: aroma, first sip, aftertaste.
- Brew the exact same recipe with filtered water (a carbon pitcher filter works fine).
- Taste both side by side and note which cup tastes smoother.
If the filtered version is noticeably better, water is part of your bitterness problem. A carbon pitcher filter is the easiest household solution. Reverse osmosis systems produce very soft water, but pure RO water can actually under-extract and taste flat, so remineralization is worth considering if you go that route.
Practical water options, from easiest to most involved:
- Carbon pitcher filter (e.g., a standard countertop pitcher): removes chlorine and some minerals, noticeably improves most tap water
- Filtered tap attachment: similar benefit, more convenient for daily brewing
- Bottled spring water: useful as a one-time experiment to see if your tap water is the issue
- RO with remineralization: best water quality, but requires setup and ongoing maintenance
One more thing: water that’s too soft can also cause problems by under-extracting the coffee, leaving it weak and sour rather than bitter. The goal is balanced mineral content, not zero minerals.
Method-by-method fixes when your brew tastes bitter
Different brewing methods have different failure modes. Here’s what to adjust based on how you brew.
| Method | Most Common Bitter Cause | First Fix |
|---|---|---|
| Pour-over | Grind too fine or water too hot | Coarsen grind one step; lower temp to 200°F |
| Drip machine | Brew cycle too fast or too hot | Use coarser grind; check machine temp setting |
| French press | Steep time too long | Cut steep to 3.5–4 minutes; use coarser grind |
| Espresso | Over-extraction (shot runs too long) | Coarsen grind; target 20–28 second shot time |
| Cold brew | Steep time too long or ratio too high | Reduce steep to 12–16 hours; use 1:8 ratio |
Pour-over: Lower your water temperature to around 200°F and try a slightly coarser grind. If you’re blooming your grounds, a proper bloom technique releases CO2 evenly and can reduce uneven extraction that contributes to bitterness.
French press: The most common mistake is leaving the plunger down and letting grounds keep steeping. Press and pour immediately at the 3.5–4 minute mark. A coarser grind also reduces the fine particles that slip through the mesh and over-extract in the cup.
Espresso: If your shot tastes bitter and runs fast (under 20 seconds), the grind is likely too coarse. If it’s bitter and runs slow (over 30 seconds), the grind is too fine and you’re over-extracting. Aim for 20–28 seconds and adjust from there.
Cold brew: Cold brew is naturally lower in acidity and often smoother, but a steep time over 18–20 hours or a ratio stronger than 1:7 can still produce bitterness. Pull it at 12–16 hours and dilute to taste.
Quick fixes for a cup that’s already brewed
Sometimes you just want to drink the cup in front of you. These additions work fast.
- Milk or cream: A splash of whole milk or a tablespoon of heavy cream coats the palate and physically dilutes bitter compounds. Even 1–2 tablespoons in an 8-ounce cup makes a clear difference. Plant-based milks with higher fat content (oat, full-fat coconut) work similarly.
- Butter or MCT oil: Used in some specialty coffee styles, a small amount of fat (about a teaspoon) blends into hot coffee and softens bitterness. The effect is real, though the flavor profile changes noticeably.
- Salt: A pinch under 1/16 teaspoon per cup suppresses bitter taste receptors without making the coffee taste salty. This is a well-documented sensory effect, not a myth. Salt works on the receptor level, which is why such a small amount is effective.
- Dilution with hot water: Adding 1–2 ounces of hot water to a bitter cup reduces concentration and can smooth the flavor. This works especially well for espresso or a brew that came out too strong.
Pro Tip: Salt is a band-aid, not a solution. Use it when you’re in a hurry, but fix your extraction variables for the next brew. A well-extracted cup shouldn’t need salt to taste good.
A word on baking soda: some guides suggest it as a bitterness neutralizer. It does raise pH, but even a small amount changes the flavor in ways most people find unpleasant. Stick with salt if you want a neutral-tasting fix.
Why a clean brewer makes a real difference
Coffee oils go rancid. Old grounds leave residue. Mineral scale builds up on heating elements. All of it amplifies bitterness in ways that no brewing adjustment can fully overcome.
Signs your equipment needs cleaning:
- A stale or sour smell when you open the brewer or grinder
- Oily residue visible on the carafe, portafilter, or brew basket
- Slower-than-usual flow through your dripper or espresso machine
- Bitterness that persists even after you’ve adjusted grind, temp, and time
Cleaning schedule:
- Daily: Rinse the carafe, brew basket, and any removable parts with hot water. Wipe down the portafilter if you use an espresso machine.
- Weekly: Wash the carafe and brew basket with dish soap. Run a water-only cycle through your drip machine. Brush out your grinder’s chute and hopper.
- Monthly: Descale your machine with a food-safe descaling solution or a diluted white vinegar cycle (check your machine’s manual first). Deep-clean your grinder burrs with a grinder cleaning tablet or a dry brush.
- Every 6–12 months: Check your grinder burrs for wear. Dull or chipped burrs produce inconsistent particle sizes, which means some grounds over-extract while others under-extract, and the result is a muddy, bitter cup.
Grinder maintenance is the most underrated part of home coffee brewing. A consistent grind is the foundation of a consistent cup, and worn burrs undermine every other adjustment you make.
A 5-minute troubleshooting checklist for a bitter cup
Work through these steps in order. Stop when the bitterness resolves.
- Taste and describe the bitterness. Is it sharp and astringent (over-extraction) or flat and roasty (dark roast / stale beans)? Sharp bitterness points to extraction. Flat, heavy bitterness points to the beans.
- Check your grind. Is it finer than medium? Go one step coarser and re-brew.
- Check your brew time. Did you exceed the recommended window for your method? Shorten by 30 seconds.
- Check your water temperature. Was it at a full boil (212°F)? Let it cool to 200°F and re-brew.
- Still bitter? Check your beans. Are they a dark roast or more than 4–6 weeks past the roast date? Try a medium roast or a fresher bag.
- Still bitter? Test your water. Brew the same recipe with filtered or bottled water and compare.
- Still bitter? Clean your equipment. Run a cleaning cycle and check for oily residue or scale buildup.
- Still bitter after all of the above? Add a small splash of milk or a pinch of salt as a short-term fix while you continue testing. For a deeper look at brewing troubleshooting, The Flaming Bean’s home brewing guide walks through each variable in more detail.
What recent research tells us about coffee bitterness
The science behind bitterness has gotten a lot more specific recently, and the practical takeaways are worth knowing.
In 2026, researchers at the University of North Carolina used cryo-electron microscopy to map exactly how the bitter taste receptor TAS2R43 recognizes multiple coffee bitter compounds at the molecular level. The finding matters because it confirms that coffee bitterness isn’t driven by one compound. Several roast-derived molecules activate the same receptor, which is why bitterness can persist even when caffeine is removed. It also explains why individual people perceive bitterness differently: receptor sensitivity varies from person to person, which means your threshold for “too bitter” is genuinely different from someone else’s.
Separately, ACS researchers found that caffeine’s bitterness was reduced by roughly 50% in trained-panel tests when combined with melanoidins and chlorogenic acids produced during roasting. This is a significant finding for home brewers.
Caffeine’s perceived bitterness dropped by approximately 50% when combined with melanoidins and chlorogenic acids in roasted coffee, suggesting roast chemistry actively masks bitter perception.
What this means practically:
- Medium roasts produce more melanoidins than light roasts, which may actually help mask caffeine’s bitterness better than a light roast does.
- Pushing extraction too far releases more free bitter compounds without the balancing effect of roast chemistry. Stop extraction before the cup tastes harsh.
- Individual bitterness sensitivity is real. If you’ve always found coffee more bitter than your friends do, receptor-level differences are a plausible explanation, not just preference.
The Phys of the UNC research also notes that coffee’s aroma and its bitter aftertaste are driven by different compounds, which is why a cup can smell wonderful and still finish harsh.
The testing plan that actually works, in my opinion
Most people try to fix bitter coffee by switching beans. That’s usually the last thing to change, not the first.
The sequence that consistently produces results: start with grind and temperature, then check your water, then consider the roast. Grind and temperature are the fastest to test and the most likely culprits. Water is easy to rule out with a single side-by-side brew. Roast level is a longer-term adjustment that matters most once your extraction is dialed in.
For each test, run at least two brews before drawing a conclusion. One brew can be an outlier. Two brews with the same result is a pattern. Note three things each time: the aroma when you pour, the flavor on the first sip, and the aftertaste. Bitterness that lingers in the aftertaste usually points to over-extraction. Bitterness that hits immediately and fades is more often roast-related.
If you want a low-bitterness starting point while you work through the variables, The Flaming Bean’s Evening Roast is a genuinely approachable option. It’s a medium roast with a smooth, balanced profile that gives you a forgiving baseline to test against.
Evening Roast: a smooth starting point for less bitter coffee
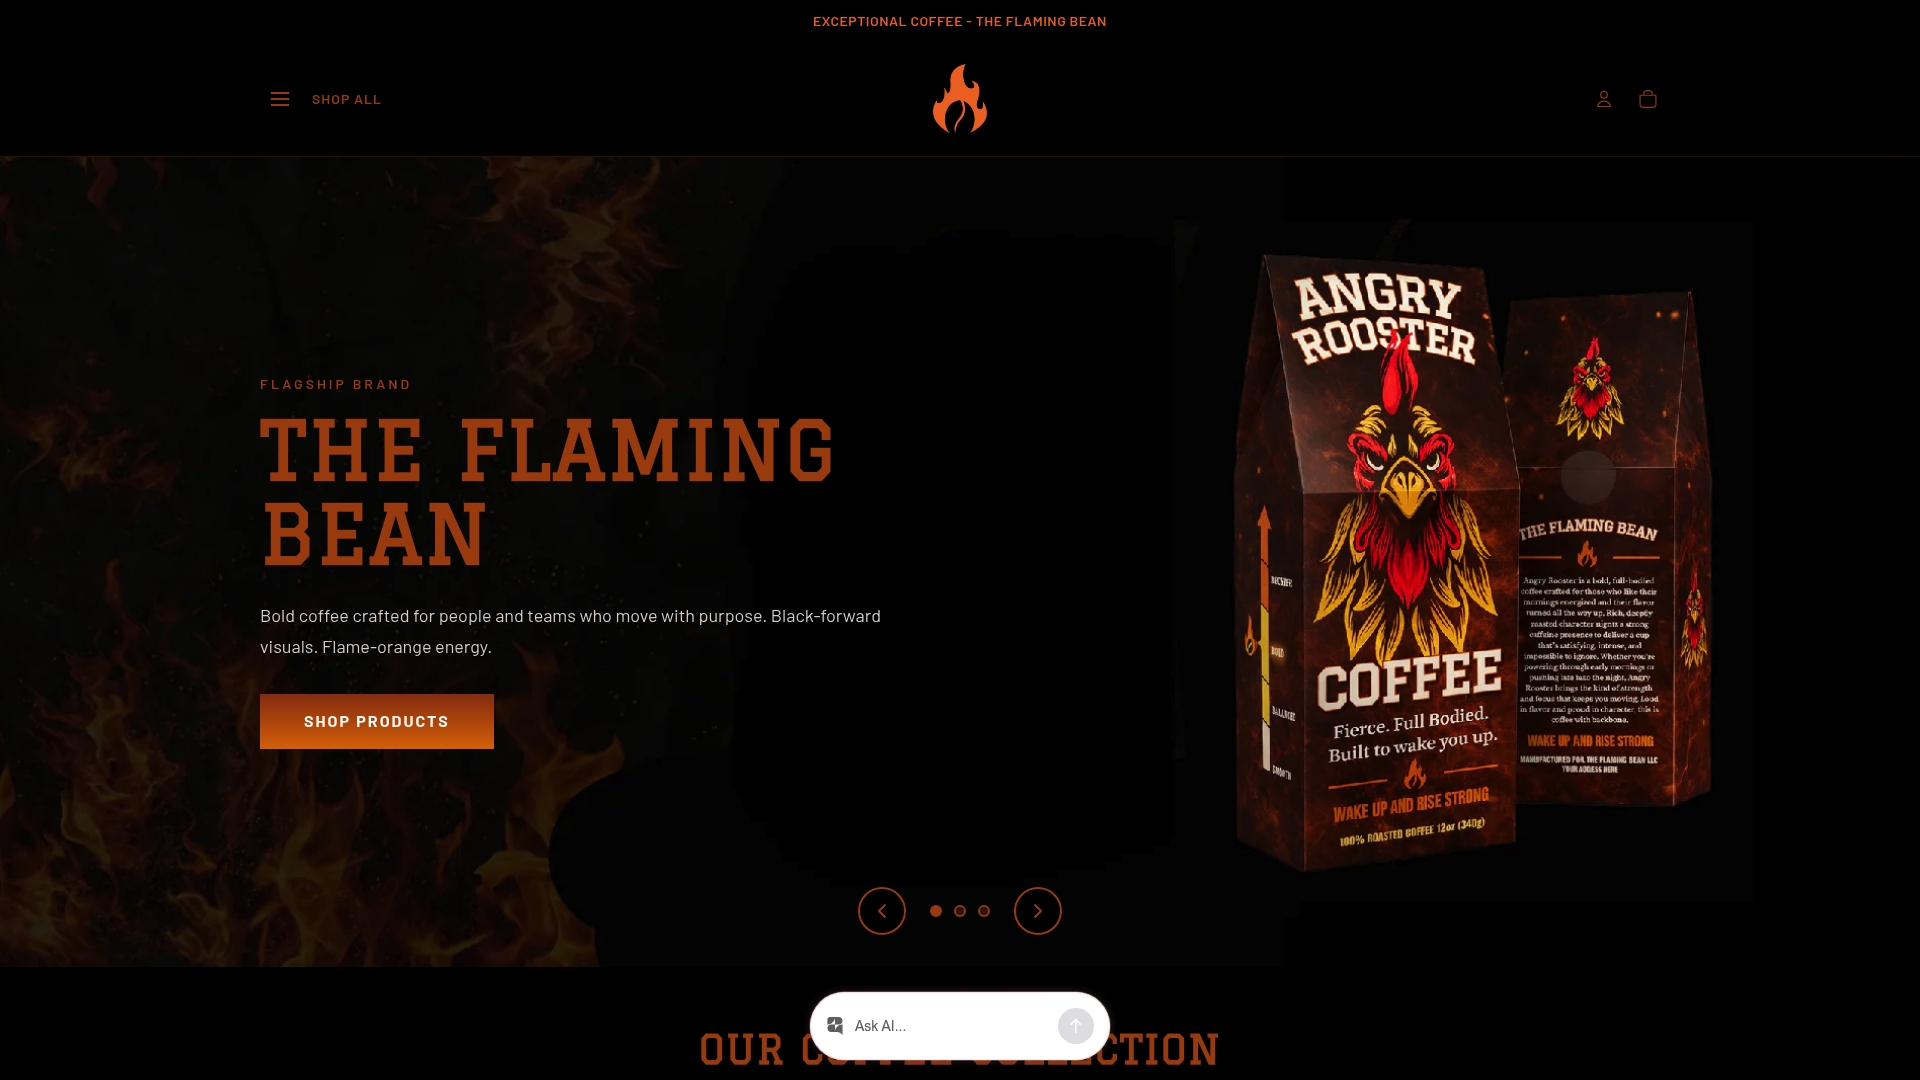
If you’ve adjusted your grind, temperature, and brew time and still find your coffee too harsh, the beans themselves may be the missing piece. The Flaming Bean’s Evening Roast is a medium roast crafted for exactly this situation: smooth, approachable, and easy to brew well without chasing perfect parameters.
It’s a good baseline for anyone who finds dark roasts consistently too bitter. The lighter roast profile means fewer roast-derived bitter compounds in the cup, and the balanced flavor holds up well across different brew methods. Want to try it before committing to a full bag? The Build a Box option lets you sample Evening Roast alongside other roasts in a smaller quantity first.
Pairing a milder roast with better technique gives you the best result. The bean choice sets the ceiling; your brewing practice determines how close you get to it. Browse coffee makers and equipment at The Flaming Bean to find gear that matches your brewing method.
Sources
- Structural insights into coffee bitter taste perception by TAS2R43 receptor | Nature Structural & Molecular Biology
- Why doesn’t coffee taste like caffeine? - American Chemical Society
- How to Make Coffee Less Bitter - Martha Stewart
- Coffee Chemistry and Bitter Coffee
- Why Your Coffee Tastes Bitter or Sour — Explained by Extraction - ITA Coffee
Recommended
- Brew Better Coffee at Home: A Practical Guide – The Flaming Bean Roastery
- Why Coffee Causes Jitters: Science-Backed Fixes – The Flaming Bean Roastery
- How to Bloom Coffee Grounds Correctly for Fuller Flavor – The Flaming Bean Roastery
- Bold Coffee Blends: 9 Examples Worth Brewing – The Flaming Bean Roastery
Comments