
Coffee Bloom Explained: What It Is and Why It Matters

The coffee bloom is the rapid release of trapped CO2 when hot water first contacts freshly ground coffee. To bloom, pour roughly twice the weight of your coffee in hot water, then wait a short period—typically about half a minute—before continuing your brew. That short pause lets CO2 escape cleanly, which prevents channeling and gives water full, even access to the soluble compounds that make your cup taste great.
Table of Contents
- What is coffee bloom, and what happens inside the grounds?
- How to bloom coffee with a pour-over: step by step
- What bloom timing and ratios actually work?
- How does blooming affect the flavor in your cup?
- Using the bloom to diagnose freshness and storage
- How the bloom changes across different brewing methods
- Troubleshooting common bloom problems
- What testing and brewing experts say about the bloom
- Key Takeaways
- The bloom is worth paying attention to
- Fresh coffee, real impact: try The Flaming Bean
- Useful sources and a video to watch
What is coffee bloom, and what happens inside the grounds?
During roasting, heat drives chemical reactions that produce CO2 as a byproduct. That gas gets trapped inside the bean’s cell structure. The moment hot water touches your freshly ground coffee, it warms the grounds rapidly and forces that stored gas out. You see it as bubbling and swelling, sometimes dramatically so on a very fresh roast.
Henry’s Law explains the physics neatly: as water temperature rises, its ability to hold dissolved gases drops, so CO2 escapes as bubbles rather than staying in solution. Think of it like opening a warm soda versus a cold one.
When CO2 escapes during the bloom, it physically pushes water away from the grounds. If that gas is still present during your main brew pour, it creates channels through the coffee bed — paths of least resistance where water races through without extracting evenly. The result is a patchy, underdeveloped cup.
The visual sequence is easy to picture: CO2 builds pressure inside the grounds, hot water triggers release, bubbles form and the coffee bed swells upward, and that swelling subsides as gas clears. Once the bloom settles, the grounds are ready to extract evenly.
How to bloom coffee with a pour-over: step by step
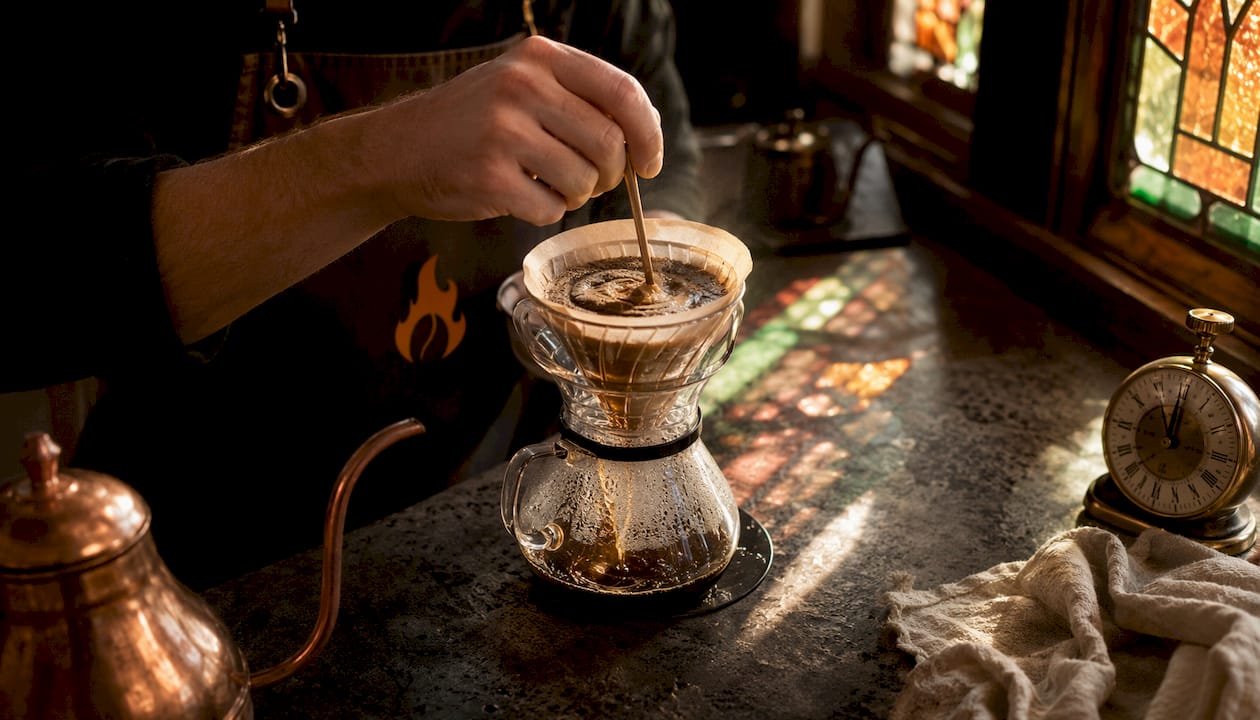
A consistent bloom routine takes about a minute and pays off in every cup. Here’s a clean, repeatable process:
- Weigh your coffee. Use a kitchen scale. A standard starting point is a moderate, typical home brewing coffee dose.
- Grind just before brewing. Grinding accelerates degassing, so grinding right before you brew preserves the most CO2 for a visible, productive bloom.
- Heat water to 195–205°F. This range extracts well without scorching the grounds.
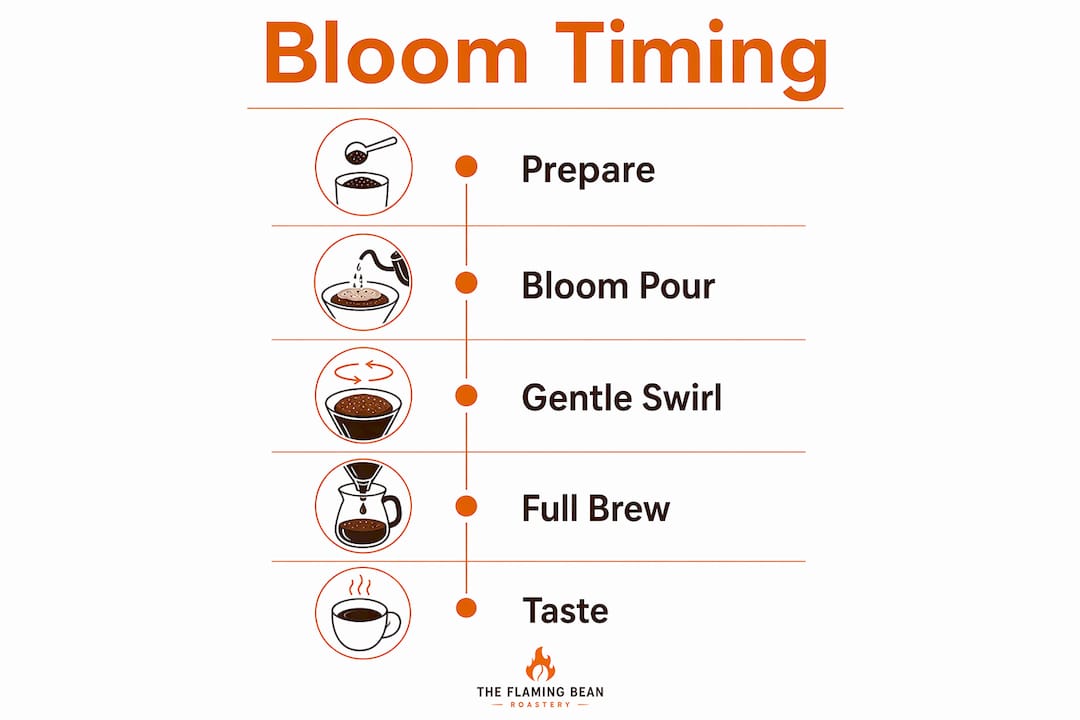
- Pour your bloom water. Add roughly twice the weight of your coffee, so 40 g for a 20 g dose. Pour slowly and evenly to saturate all the grounds.
- Wait 30–45 seconds. Watch the bed swell and bubble. This is your bloom window.
- Continue your pours. Once the bloom settles, proceed with your normal pour-over recipe in steady, controlled pours.
On agitation: a gentle swirl of the brewer right after the bloom pour helps saturate dry pockets without disturbing the bed too much. Vigorous stirring is a different story. Excessive agitation can push fine coffee particles into the filter, slowing drawdown and over-extracting those fines into bitterness.
Pro Tip: After your bloom pour, give the brewer one slow, gentle swirl rather than a stir. It evens out saturation without sending fines into the filter.
What bloom timing and ratios actually work?
The 2:1 water-to-coffee ratio is the standard starting point for the bloom pour, and 195–205°F is the accepted temperature range across most pour-over recipes. Timing, though, shifts depending on what’s in your grinder.
| Roast level | Suggested bloom time | Why |
|---|---|---|
| Very fresh light roast | Longer bloom time | High CO2 content; dense beans need more time to fully degas |
| Medium roast | Moderate bloom time | Moderate CO2; standard timing works well |
| Dark roast | Short bloom time | Faster degassing; less CO2 stored in the bean |
| Older beans (aged) | Short bloom time | Much of the CO2 has already escaped |
Roast level directly affects how long your bloom needs: light roasts are denser and hold more CO2, so they benefit from a longer rest. Dark roasts degas faster during and after roasting, so a shorter bloom is usually enough.
One practical caution: if you extend the bloom beyond about 60 seconds, your water temperature drops noticeably. Cooler water extracts less efficiently, which can flatten the cup in a different way. For most home setups, 45 seconds is the sweet spot between thorough degassing and maintaining brew temperature.
How does blooming affect the flavor in your cup?
The short answer: it makes a detectable difference. Blind-tasters consistently identified bloomed coffee as richer, rounder, and fuller-flavored compared to un-bloomed samples in Serious Eats testing.
The reason connects directly to extraction chemistry. CO2 is slightly acidic when dissolved in water, forming carbonic acid. When CO2 is still present during brewing, it contributes to a sour, flat taste and blocks water from reaching soluble flavor compounds evenly. Blooming clears that interference.
What you can expect from a well-executed bloom:
- Fuller body: water contacts more of the grounds evenly, extracting more of the oils and solids that create mouthfeel
- Cleaner aromatics: CO2 out of the way means volatile aroma compounds release more freely into the cup
- Reduced harsh acidity: carbonic acid is gone before the main extraction begins
- Clearer tasting notes: chocolate, fruit, and floral notes come through with less muddy interference
Overblooming has its own risks. Extending the bloom too long on a dark roast can start extracting bitter compounds before the main pour even begins. On a light roast, a very long bloom with cooling water can underextract the delicate acids that give the coffee its brightness. The table in the previous section gives practical guardrails for each roast level.
Using the bloom to diagnose freshness and storage
The bloom is one of the most honest signals your coffee gives you. Read it right, and you know immediately whether your beans are in good shape.
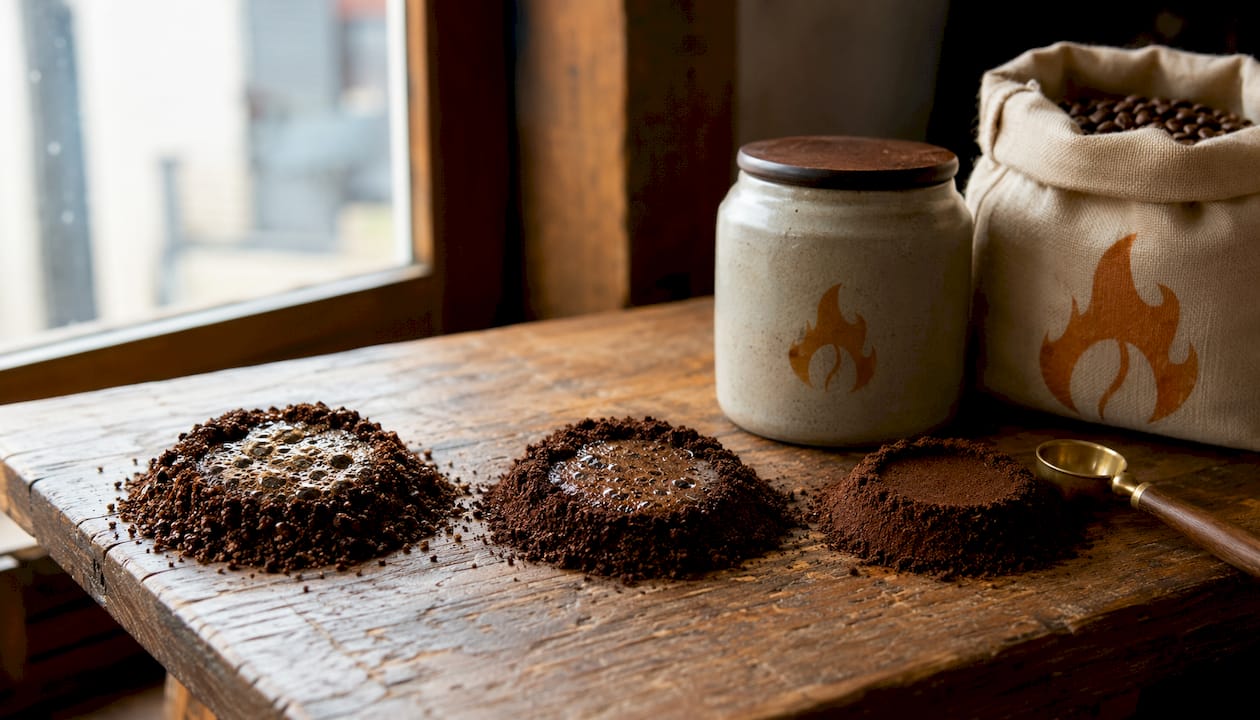
- Vigorous, high-volume bloom with sustained bubbling: very fresh beans, likely within 1–2 weeks of roast date. This is what you want.
- Moderate bloom that settles in 30 seconds: beans are in the normal freshness window, 1–3 weeks post-roast. Brew normally.
- Faint bubbling or no bloom at all: beans have degassed or been stored poorly. Stale coffee, or coffee stored in an open container, loses its CO2 before it ever reaches your brewer.
- Extremely aggressive foam on a very fresh light roast: the beans may need another day or two of rest before brewing so the flavors stabilize.
Grind size also shapes what you see. A finer grind exposes more surface area, which accelerates CO2 release and produces a more dramatic bloom. A coarser grind releases gas more slowly and may look less impressive even on fresh beans.
Pro Tip: Check the roast date on your bag before you brew. Most beans hit their flavor peak between 5 and 14 days post-roast. A bag with no roast date is a red flag.
For storage, keep beans in a sealed bag with a one-way valve, away from heat and light. One-way valve packaging lets CO2 escape after roasting without letting oxygen in, which is exactly what preserves freshness until you’re ready to brew. A weak bloom on beans you just opened usually means the bag wasn’t sealed properly or the beans sat too long.
A low bloom isn’t always a problem. Older beans used for darker espresso-style profiles have already degassed, and that’s fine for those applications. But if you’re brewing pour-over and expecting clarity, a flat bloom is a cue to reorder.
How the bloom changes across different brewing methods
Pour-over gets the most attention for bloom technique, but the principle applies elsewhere.
- AeroPress: a short preinfusion works well. Add a small amount of water (roughly twice the coffee weight), wait 20–30 seconds, then press or continue your recipe. The inverted method gives you a bit more control over this step.
- French press: prewetting the grounds before adding the rest of your water helps, but the long immersion time (4 minutes or more) largely compensates for incomplete degassing. A short 20-second rest after the initial pour is still worth doing.
- Espresso: there’s no traditional bloom step because pressure-based extraction works differently. However, degassing matters for puck integrity. Beans that are too fresh can produce an inconsistent puck and uneven extraction; most roasters recommend resting espresso beans 7–14 days post-roast before pulling shots.
- Competition and continuous-pour methods: some competition brewers skip a distinct bloom and use a series of small, rapid pours instead, achieving progressive saturation without a defined rest period.
Troubleshooting common bloom problems
Weak or no bloom: the most common cause is stale beans. If your beans are more than three weeks past roast, most of the CO2 is gone. A grind that’s too coarse can also reduce visible bloom intensity. Fix: buy fresher beans and check your grinder settings for a slightly finer grind.
Extreme, overactive foaming: very fresh light roasts can produce an almost volcanic bloom. This is a good sign, but it can make timing tricky. Let the bloom settle fully before continuing, and consider a slightly longer rest (up to 60 seconds) to let the most aggressive degassing finish.
Bubbles continuing after the main pour starts: this means the bloom didn’t fully clear the CO2. Increase your bloom time by 10–15 seconds on the next brew, or improve saturation by pouring more evenly across the grounds during the bloom step.
Grind distribution issues: if your grinder produces a lot of fine particles alongside coarser ones, the fines bloom quickly while the coarser pieces lag. This creates an uneven extraction signal. A burr grinder with consistent particle size gives you a more reliable bloom and a cleaner cup.
When technique tweaks don’t help, the beans themselves are usually the issue. If you’ve adjusted grind, timing, and water temperature and still get a flat, sour cup with no visible bloom, it’s time to reorder with a fresh roast date.
What testing and brewing experts say about the bloom
The evidence for blooming is practical and consistent. Serious Eats blind-tasting results showed that tasters reliably preferred bloomed coffee for its richness and roundness. That’s not a subtle difference — it’s a perceivable improvement in body and flavor clarity that shows up even without knowing which cup was bloomed.
Brewing experts at Fellow and Bean Ratio treat the bloom as a diagnostic tool, not just a technique step. A vigorous bloom tells them the beans are fresh and the extraction will start clean. A weak bloom tells them something is off — either the beans have aged past their peak or storage has let oxygen in. The bloom is, in their framing, the first quality check of every brew session.
Where experts disagree is on agitation. Some favor a gentle swirl, others prefer a short stir, and some leave the bloom completely undisturbed. There is no single consensus on the best approach. The safe takeaway for home brewers: start with a gentle swirl, taste the result, and adjust from there. Extended bloom experiments (some practitioners have tried multi-minute blooms) can produce sweeter finishes but also risk cooling the brew water and diminishing returns on extraction.
Key Takeaways
The coffee bloom is a small technique with a real, taster-confirmed impact on body, clarity, and flavor — and it doubles as your most reliable freshness check.
| Point | Details |
|---|---|
| What the bloom is | CO2 releasing from fresh grounds when hot water hits them, causing visible swelling and bubbling. |
| Standard bloom recipe | Use twice the coffee weight in water (e.g., 40 g for 20 g coffee) and wait 30–45 seconds. |
| Bloom as a freshness check | Vigorous bloom means fresh beans; little or no bloom means the coffee has degassed or been stored poorly. |
| Roast-level timing | Light roasts benefit from longer bloom times; dark roasts degas faster and generally require shorter bloom times. |
| The Flaming Bean recommendation | Try Evening Roast for a milder bloom or Safe Ground for a mission-driven cup with a distinct bloom character. |
The bloom is worth paying attention to
Most home brewers treat the bloom as a ritual they’ve seen in videos but aren’t sure actually matters. The blind-tasting evidence says it does. But what I find more interesting is how the bloom reframes your relationship with your beans. It’s not just a step in a recipe. It’s real-time feedback.
When you pour that first small amount of water and watch what happens, you’re getting information. A big, active bloom tells you the beans are fresh and the extraction is going to start well. A flat, quiet bed tells you something is off before you’ve even committed to the full brew. That’s useful. Most brewing variables are invisible until you taste the result. The bloom is one you can actually see.
My suggestion: try adjusting your bloom time by 15 seconds in either direction on your next two brews and taste them side by side. You’ll notice a difference, especially on a fresh light roast. The Flaming Bean’s Evening Roast is a great starting point for this experiment. It’s an approachable darker roast that produces a clean, moderate bloom and a forgiving extraction window. If you want to try something with a little more social weight behind it, Safe Ground is a mission-driven blend that supports organizations protecting vulnerable communities, and it brews beautifully with a standard 30–45 second bloom.
The bloom won’t fix bad beans or a bad grinder. But on good, fresh coffee, it’s one of the simplest ways to get more out of every cup.
Fresh coffee, real impact: try The Flaming Bean

If the bloom experiment sounds appealing, you need beans worth blooming. The Flaming Bean roasts to order and ships direct, so you’re getting coffee at peak freshness, not beans that have been sitting in a warehouse for months. The Evening Roast is a smooth, approachable option that’s easy to dial in for any bloom technique. The Safe Ground blend goes further: every bag supports organizations working to protect vulnerable individuals and strengthen communities. Bold flavor and a cause worth backing. Browse the full range at The Flaming Bean and pick a roast that’s ready to bloom.
Useful sources and a video to watch
These are the sources behind the claims in this article, plus a visual demo recommendation for anyone who learns better by watching.
- The Hows and Whys of Blooming Coffee — Serious Eats: the blind-tasting evidence for bloom’s flavor impact; supports the richness and roundness claims in the flavor section.
- Blooming — Roastopedia: solid overview of bloom mechanics, degassing windows, and the case for grinding just before brewing.
- What is a Coffee Bloom? — Fellow: expert framing of bloom as a freshness diagnostic; useful for understanding what baristas look for.
- The Science Behind Coffee Bloom — Bean Ratio: plain-English explanation of Henry’s Law and why temperature drives CO2 out of solution.
- Swirl, Stir, or Leave the Bloom — Perfect Daily Grind: covers the agitation debate and roast-specific timing adjustments; supports the “no single best technique” takeaway.
- Bloom Phase: How to Read the Bubbles — Serious Eats: extended bloom experiments and what happens when you push bloom time past the standard window.
- Video demo: search YouTube for “pour-over coffee bloom technique” and look for a video that shows the bloom in real time from above the brewer. Watching the bed swell and settle makes the timing cues much easier to recognize than any written description can.
Recommended
- Coffee Brand Differentiation Explained for Enthusiasts – The Flaming Bean Roastery
- Coffee Certification Explained: A Complete 2026 Guide – The Flaming Bean Roastery
- Why Coffee Brings People Together – The Flaming Bean Roastery
- Purpose-Driven Coffee Benefits: What Every Cup Can Do – The Flaming Bean Roastery
Comments